I previously blogged about building a RAG the "hard" way, with a headless react interface, and a Python backend. That involved a lot of manual construction, and wasn't very "Drupal-like." (This isn't my first time building a headless React interface, and I have opinions about it.) BUT - what if I told you there's an easier way, using only contrib modules? Read on!
The Basics
It starts with the AI module. It's not the only option on drupal.org, but it has quickly grown an ecosystem around it. There are lots of modules that rely on the AI module, and we will use some of them. Install & enable it using the normal methods (ideally, Composer + Drush). In particular you'll want to enable the AI Core module.
What else? You'll need a provider.
Provider
I used OpenAI, because I already had an account there, and ChatGPT is a good option. (Claude is also popular; YMMV.) In particular, you will need to:
- Register with the provider (ie. OpenAI)
- Provide a credit card (sorry... I don't know anyone who provides a free api!)
- Get an api key - remember to write it down somewhere safe, because they won't show it to you again.
Once you have your api key safe, you'll need to enter it into your Drupal site. You'll need several modules for this:
- OpenAI provider (or whoever you use)
- AI Search
- Key
- AI Assistant API
- AI Chatbot
Someone said the AI module is like search_api for AI. It's true, because you still need a server and an index. This is where things get different: AI doesn't use a relational database, like Drupal. It uses a vector database, so you'll need to set one up.
Vector DB
The vector database requires its own server. I used Pinecone, because they have an awesome free tier. Setup is simple, because we're not exporting or importing anything (the way I did in my last blog post). Instead, the AI Search module handles it for us. Even better: it plugs directly into the search_api module (thanks to AI Search). Here are the steps:
- Get another api key - this time from Pinecone
- Set up an empty database inside Pinecone, using their website
- Install & enable the ai_vdb_provider_pinecone module
- Go to the Search API admin in your Drupal site: /admin/config/search/search-api
- Add your Pinecone server:
- Backend: "AI Search."
- Vector Database: "Pinecone DB"
- Database Name: Choose the Pinecone db you created earlier
- Add a namespace (required)
- Save
- Add an index:
- Choose an index name, eg. "public"
- Select the correct Datasources, eg. "Content"
- Server: Pinecone (the server you created earlier)
- Check the "Enabled" box
- Optional: Add a description
- Save
Don't forget the index your data! Note: This may take several minutes. Indexing data in a vector database requires calculations; it's not as simple as the relational db you're used to dealing with. For more information, you can read up on what makes a vector db different.
AI Assistant
Now you've created your accounts with OpenAI and Pinecone, and you've created API keys. You've connected your vector db, but now you need to create an "assistant" who can read the database. This is Retrieval Augmented Generation... you're about to create the actual RAG.
To create your RAG:
- Go to the admin page: /admin/config/ai/ai-assistant
- Click on "Add AI Assistant"
- Configure your new assistant:
- Label: Whatever you want
- Check the "Enabled" box
- Instructions: This is important. Write a human-friendly prompt for your AI chatbot. Here's an example:
Answer the question based on the context, and if the question can't be answered based on the context, then try to suggest a similar topic that is available in the context. Try to cite sources to the links in the context when possible.
This is known as fine tuning, and is the focus of a lot of work in generative AI. The better your prompt, the better the chatbot answers will be. How do you define "better?" That's entirely up to you, and your use case. - Check the box to "Enable RAG Actions"
- Choose the RAG database you created earlier
- RAG description: This is also important; add a human-friendly explanation as to why your AI assistant should use this source.
- AI Provider: Choose the AI provider you set up earlier (in my case, OpenAI)
- Model: I picked something "modern." At the time of my writing, that was gpt-4o. This is another important decision; there was a newer "o1" model available, but I found it gave worse answers. YMMV.
- Save
Nice work - your backend is complete. In the words of a famous Star Trek engineer: "Now we can begin."
Chatbot
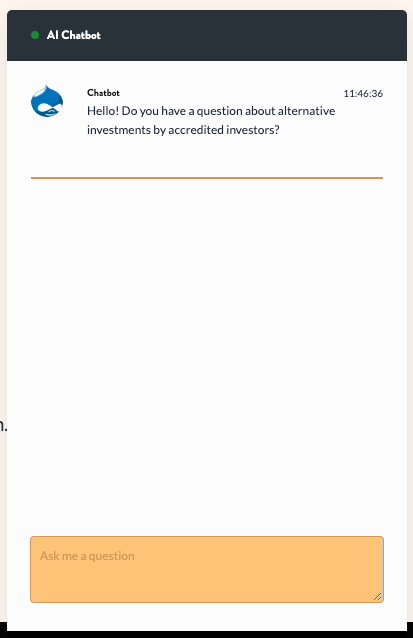
Now that we've finished the backend, we can install the frontend: a chatbot that will interact with your web visitors. No Discord server required; this chatbot will take questions directly on your website, in a little popup dialog:
You need to embed this chatbot somewhere. Fortunately, it's available as a block. Embed the block on your site using the usual method:
- Visit the admin page: /admin/structure/block
- Select the region where you want to embed your block. Nothing needs to actually appear there, but for our purposes you have to pick somewhere. Click the "Place Block" button for your desired region.
- Select "AI Chatbot" from the list of available blocks
- Title: You have to give it a title, but you can un-check the box to display the title. It's still visible on the admin page.
- AI Assistant: Choose the assistant you just created (your RAG)
- First Message: Also important; this is the first thing your chatbot will say to new visitors.
- Optional: Restrict the chatbot to certain pages, content types, or roles. This depends entirely on your use case.
Conclusion
That's it. You're done. You have a functional RAG that's visible to your users, and you did it without writing a single line of code. (Fine tuning counts as coding, depending on who you ask.) Congratulations!
Questions? Complaints? I don't take comments here, but please reach out to me directly: https://koplowiczandsons.com/contact
Comments